Your first working request
1. Connect with your API key
Section titled “1. Connect with your API key”Use Protobuf for your application. Compact binary messages reduce data transfer and support efficient encoding and decoding. JSON is useful for inspecting requests and trying recipes.
Connect to the public Infoplaza WebSocket API and pass your Infoplaza API key in the api_key query parameter:
wss://api.infoplaza.com/v1/transit/implanner?api_key=YOUR_API_KEY| Format | Query parameters | Request |
|---|---|---|
| Protobuf (default) | api_key=YOUR_API_KEY | Encoded planner.PlanRequest |
| Protobuf (explicit) | api_key=YOUR_API_KEY&mode=proto | Encoded planner.PlanRequest |
| JSON | api_key=YOUR_API_KEY&mode=json | Text envelope with type and payload |
The mode parameter defaults to proto. Both formats provide the same planning features.
For a server application, store your key in the INFOPLAZA_API_KEY environment variable. The Node.js example reads it directly. For browser integrations, use your application’s approved API-key configuration.
Follow Generate TypeScript types to prepare the imports below.
2. Send a real place pair
Section titled “2. Send a real place pair”These coordinates are public places near Utrecht Centraal and Utrecht Science Park. The JavaScript timestamp stays current when you run it.
import { planner } from "./generated/planner";
const endpoint = new URL("wss://api.infoplaza.com/v1/transit/implanner");endpoint.searchParams.set("api_key", INFOPLAZA_API_KEY); // From your app configurationconst socket = new WebSocket(endpoint);socket.binaryType = "arraybuffer";
socket.addEventListener("open", () => {  const request = planner.PlanRequest.create({    fromPlace: "52.0894,5.1102",    toPlace: "52.0925,5.1813",    timestamp: new Date().toISOString(),    arriveBy: false,    timeSlack: 0,    includePricing: true,  });  const bytes = planner.PlanRequest.encode(request).finish();  socket.send(new Uint8Array(bytes).buffer);});
socket.addEventListener("message", (event) => {  if (typeof event.data === "string") {    console.error("Server message", JSON.parse(event.data));    return;  }  const result = planner.model.PlanResult.decode(new Uint8Array(event.data));  for (const trip of result.trips) {    console.log(      trip.expectedStartTime || trip.aimedStartTime,      trip.duration,      "minutes",      trip.transfers,      "transfers",    );  }});socket.addEventListener("error", () => console.error("Connection failed"));
3. Keep listening until completion
Section titled “3. Keep listening until completion”One frame is one PlanResult, which can contain several trips. The first frame is not necessarily the final set of options. A successful search ends with a normal close (code 1000). A new search after that needs a new connection.
A normal close can still accompany no trips. Keep transport failure, routing errors and an empty search as separate UI states. See the lifecycle.
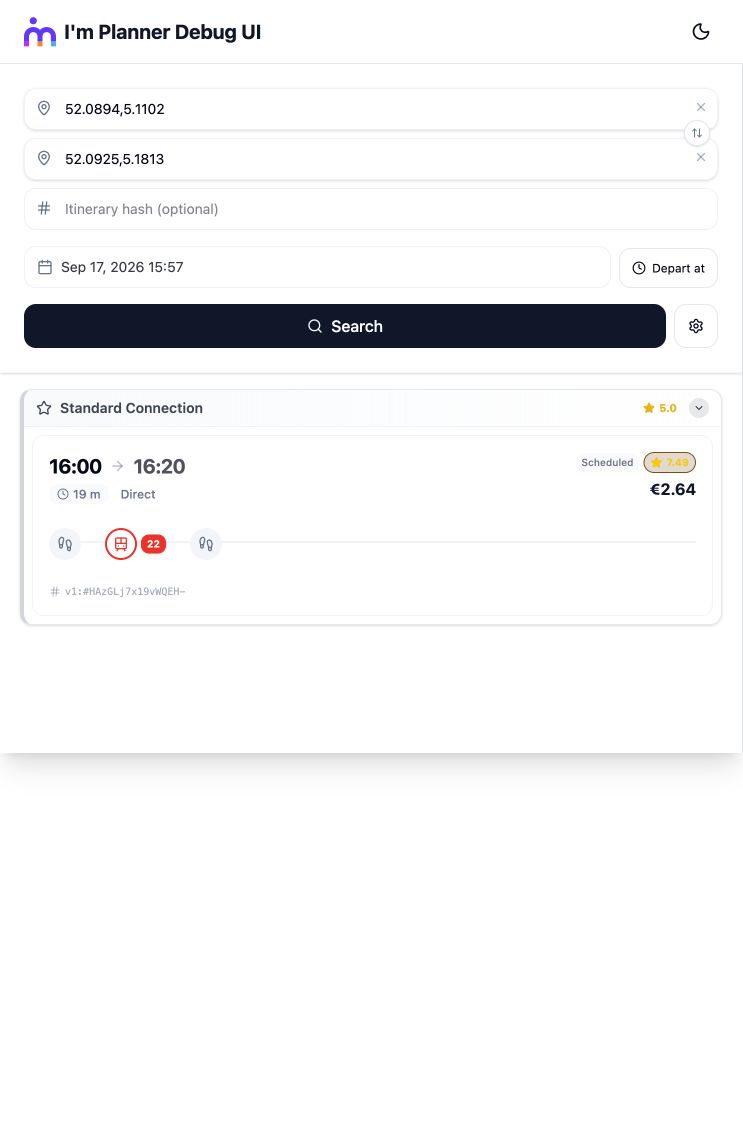
Journey options from Utrecht Centraal to Science Park.
4. Make it your own
Section titled “4. Make it your own”- Change
arriveBytotruefor an arrival deadline. - Add
excludeModes: [planner.model.enumerations.TransitMode.RAIL]to search without trains. - Add
useFlexibleRouting: truewhere flex services operate. - Set
lessWalking: trueto prefer less walking. - Use the recipe explorer for copyable combinations.